Friday, October 15, 2010

Panasonic AF-100 Prototype Test Footage

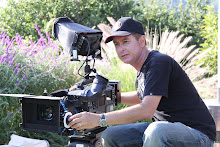
Here is some lovely imagery from a prototype Panasonic AG-AF100 large sensor video camera. Recording was actually done on AVC-Intra 100 vs. AVCHD for this clip.

Panasonic AF-100 Hi-RES Extended RE-Cut evaluation by CREWS.TV from Yves Simard on Vimeo.


The AG-AF100 promises freedom from the compromises of DSLR's and 35mm DOF adapters in a very affordable package with flexibility to use just about any lens imagineable.

Many thanks to Yves Simard for making this test footage available.

Monday, September 20, 2010

Panasonic AG-AF100 vs. Canon DSLR Features


Clean monitoring at full 1920x1080 resolution, suitable for recording to an external recorder

Clean HDMI output at full resolution even during recording, suitable for recording

Professional HD-SDI output

1080/24pSf output

A composite video output jack

SMPTE timecode

LTC timecode synchronizing, for multiple-camera shoots or for using an external audio recorder or timecode slate

A headphone jack for monitoring audio

RCA audio outputs

Professional XLR audio inputs

Line/Mic selectable

Can supply phantom power for microphones

Manual audio level control with no AGC

Option of engaging an automatic limiter to prevent against sudden overmodulation

High-quality audio pre-amps

1080/60i and 1080/50i recording modes

Variable frame rates in 20 steps, from 1080/12p up to 1080/60p, for various levels of slow-motion and fast-motion

720/24p and 720/25p and 720/30p recording modes (in addition to 1080/24p, 1080/25p, 1080/30p, 720/50p, 720/60p, 1080/50i and 1080/60i)

P2/AVCCAM Metadata

Two card slots

Professional image controls

Filmlike Cinegamma gamma curves

Selectable color matrices

Adjustable knee point and master pedestal controls right in camera
Dynamic Range Stretching feature

Color-matched with other Panasonic professional cameras, such as the VariCams

Pre-record, for catching events occurring even before you press the record button

Continuous recording capacity of over 12 hours in economy mode, and continuous recording of six hours in best-quality mode on a single card (no 12-minute time limit!)

Complete freedom from overheating issues

Colored Focus Assist that can be used while recording

Capable of video-camera-like autofocus (when used with an appropriate lens)

Face-detection autofocus that can track focus on a moving face

Peaking/EVF DTL for easier manual focus

High-definition color LCD panel

High-definition color viewfinder

Viewfinder that can actually be used during video recording

Two sets of zebras, which can be set from anywhere from 50 to 105 IRE in 5-IRE steps

A built-in Waveform Monitor(!)

A built-in Vectorscope

A built-in Spotmeter (the "Marker" which tells you the IRE brightness of what's in the center of the screen)

Different aspect ratio markings in the LCD, including 16:9, 4:3, 14:9, 1.85:1 and 2.35:1

A 90% "safety zone" for making sure your framing will be visible on all TVs

Film-style variable shutter angles from 1 to 360 degrees, which track automatically with the variable frame rates to always provide consistent motion blur

Syncro-Scan shutter in video mode, giving you nearly infinitely-settable shutter speeds from 1/24.0 to 1/250.0

Built-in optical neutral density filters, including ND .6, ND 1.2, and ND 1.8

SMPTE color bar generator

Cleaner/sharper images with a substantial reduction in aliasing

Elimination of the purple/orange moire that happens on all Canon DSLRs

A much more robust recording format (AVCCAM PH mode) which is more resilient and better than the h.264 on the DSLRs

Elimination of the fixed pattern noise and "vertical streaking"

Greatly improved rolling shutter performance

Ability to assign index points within clips, so you can mark a subsection of a clip and easily jump from spot to spot within that clip

Ability to mark clips "Good" or "No Good" at the press of a button, and that marker will show up in your NLE (depending, of course, on your NLE)

Ability to delete the last clip you just shot, at a button press

Ability to assign custom user names to clips as they get recorded, automatically

Ability to save and exchange "scene files" with other users, for easy matching between multiple cameras

Ability to take any PL-mount lens (not just a few limited telephoto lenses, or having to physically remove the mirror out of your DSLR)

Ability to take c-mount cinema lenses

Ability to take much larger batteries, including 6000mah batteries

Wireless infrared remote controller

Remote iris/focus/start/stop controller sockets

Can perform a manual black balance, with a dedicated physical iris

Fully articulated LCD panel (only the Canon 60D offers this, the others don't)

And, to top it all off, a three-year warranty

This list is from DVXUser.com, compiled by Barry Green. All is based upon Panasonic prototypes, subject to change and independent testing and actual production model delivery in December, 2010.

Friday, September 10, 2010

New Panasonic AF100


The soon to be delivered Panasonic AG-AF100 micro 4/3" large sensor HD camera debuted as a working model at IBC today. Finally, 35mm selective focus and wide field of view, in a small form factor with real video camera features. Here are some details from UrbanFox.TV Blog:

UrbanFox.TV Blog: New Panasonic AF100/AF100

And Barry Green at DVXUser.com as well as a European blog:

http://www.dvxuser.com/V6/showthread.php?t=222673

http://whatcaughtmyeye.blogspot.com/2010/09/panasonic-steals-ibc-show-for-me.html

The AF100 promises to offer Panasonic colorimetry, gamma options, variable frame rates up to 1080/60P, in addition to HD SDI and HDMI simultaneous outputs, orientable HD LCD display, plus ocular HD viewfinder, XLR audio inputs and a CMOS sensor that is 4x larger than a 2/3" video camera and very close to 35mm Academy frame size. Using lens mount adapters, it will accept 35mm SLR lenses and PL-mount motion picture lenses. AF100 is a real video camera without DSLR compromises, ie; not designed as a still camera with video as an afterthought, greatly reduces aliasing and CMOS skewing issues.

SSV will be adding this camera to our rental inventory as soon as it is available........stay tuned!


Wednesday, February 24, 2010

Best Practices for Shooting with the Letus Ultimate


Shooting with a 35mm DOF(Depth of Field) Adapter can yield amazing results, especially compared to the normal look of a 1/3" palmcorder, where everything in the frame is in focus. A 35mm DOF adapter allows focus to help tell the story, by highlighting the important parts in the frame through selective focus. Here are some tips for getting the most out of our Letus Ultimate 35mm DOF adapters:

The Letus Ultimate can be mounted to most any camera, either directly to the front of the built-in lens, or via a Letus Relay Lens for cameras that have detachable lenses. Here we'll focus on palmcorders with built-in zom lenses such as Panasonic HVX200, HPX170, Sony EX1, as well as many Canon and JVC models.

Once the Letus Ultimate is mounted onto the camera's stock lens, there is a lot of flexibility in frame size via the camera's built-in zoom lens. This allows you to choose between Full Frame 35mm(35mm still camera) frame size or Academy(motion picture) frame size, or anywhere in between or tighter. Frame size affects field of view, magnification of focal length and depth of field.

Our Ultimate's are available with Nikon, Canon and PL-Mount lens mounts, allowing for 35mm SLR or motion picture primes or zooms. It's important that the lens have manual iris and focus control, the more focus rotation the better. We offer a set of eight Nikon 35mm SLR prime lenses with Zacuto focus gears for use with our Zacuto follow focus control.

Once the video camera's zoom is set for the wanted frame size, focus on the ground glass in the Ultimate. It is best to tape the focus barrel down, although taping the zoom down as well will prohibit you from using the zoom to quickly alter focal length when needed vs. taking the time to change 35mm lenses when small frame adjustments are wanted.

Press the red button to power up the Ultimate and confirm power by seeing a green light and "99" on the speed display. Always keep the speed at maximum, 99. Do not turn off between takes. The Ultimate is powered by two AA batteries or external DC power.

Set the front focus of whatever 35mm lens is mounted to the Ultimate.

Back focus on the Ultimate is the large blue ring. Loosen both silver knobs on the blue ring and turn the ring in 1/4 or more rotations, not tiny increments, with the taking lens at infinity. Use an object at least 50' away for back focus. It is best to have the 35mm lens and camera's iris wide open for this procedure.

If possible, avoid shooting with the camera's stock lens wide open. F2.8 or f4.0 will result in a sharper, higher contrast image.

Use the 35mm taking lens f-stop to choose the wanted depth of field, not for exposure. Two stops from wide open is optimal for sharpness and contrast, but shooting wide open will result in the most shallow depth of field and is an aesthetic choice. Just know that shooting wide open will make even a static head shot a challenge for focus.

Actual image exposure should be done with the camera iris and/or internal camera ND filters(for outdoors). Try to keep the 35mm taking lenses at a constant iris in order to maintain depth of field consistency.

You will use 50mm and 85mm lenses for interview single head shots, primarily. The 85mm will have more shallow DOF due to its longer focal length.

We recommend using 17" or larger HD monitors for critical focus. Also red peaking, or pixel to pixel modes, if offered on the monitor. Large monitors are more likely to show ground glass grain and flicker issues as well as dust particles.

Try to avoid light pointing directly at taking lenses which can cause flare and contrast reduction. A matte box or flags are useful light control methods.

If the above steps are taken, you will have a good experience shooting with a 35mm DOF adapter. Do know that this tool has a learning curve. Check all footage carefully--focus is more difficult than you would think. While not as easy to shoot with as a stock zoom lens, the results will be more cinematic and natural looking, and is a good complement to shooting at 24 fps. Also, 35mm DOF adapters are a great way to separate you from your competition!

Tuesday, January 26, 2010

Best Practices for Tapeless Workflow


The concept of shooting without tape is still daunting to many. There is a comfort level having a pile of tapes at the end of the shoot day. While understandable, there are so many benefits to ready-to-edit clip-based files that getting past the tape mindset is worthwhile and have been highlighted on this blog previously(see "Going Tapeless").

Here I want to highlight best practices for shooting tapeless. The best approach, based upon years of experience recording onto on-board hard drives(nNovia, FireStore) and memory cards(P2 and SxS), is for the producer or director to bring two external USB or FireWire(FW800 is fastest) hard drives of 160Gb or more capacity to the shoot. SSV can provide the laptop computer with the appropriate file transfer and viewing software. Hard drives are available for rental as well.

That's pretty much it, assuming somebody on the crew is experienced with doing the data transfer. During the course of the shoot day, data can be transferred as each memory card is filled or all can be done at the end of the day during strike--assuming enough memory card capacity is available on-set in the latter example(data transfer could take over an hour, depending on total record time and format).

Some specific technical points worth knowing are: always write-protect the card before inserting it into a laptop slot or card reader, always have a clip viewer designed to playback the clips from the cards prior to data transfer and for playback from the external hard drives once the data transfer is completed. I recommend using software that does data verification during the transfer process, using two drives simultaneously, so that there is a digital clone of all the footage. During the data transfer, low-res Quicktime proxy files with time code display can be generated and uploaded to a server, put on a thumb drive, sent to an iPhone, etc. for fast, convenient dailies. Some popular software applications include P2 Viewer, P2CMS, ShotPut Pro, XDCAM Transfer, XDCAM Browser, Final Cut Log and Transfer and ProxyMill.

Here are the downloads you’ll need for working with P2:

http://www.panasonic.com/business/provideo/support/software.asp

Now, here are the downloads you’ll need if you’re working with SxS cards:

http://pro.sony.com/bbsc/ssr/micro-xdcam/resource.downloads.bbsccms-assets-micro-xdcam-downloads-XDCAMSoftwareDownload.shtml#apps

Your laptop should now be able to recognize your P2 card/SxS card once it’s connected and you have a way to play back the files you’ve created.

Transferring the data to the hard drive is the next step. Can you use the Finder, Explorer or just drag and drop things? Yes. But, look, just go to Imagine Products and buy Shotput Pro. It’s $99, it verifies the data, allows you to copy to multiple hard drives simultaneously, automates the whole process and is absolutely indispensable.

If the above best practices are adhered to, tapeless recording is pretty painless--especially when compared to time consuming real time ingest into a non-linear edit system via an expensive HD VTR. Almost all new professional cameras going forward are tapeless, so it makes sense to embrace the work flow and its benefits--and your editor will thank you for it.

Tuesday, December 22, 2009

P2 Hits Its Stride in 2009


Here's a good article on the advancements of P2 tapeless recording technology and workflow, as well as the new studio quality AVC-Intra 100 format:

P2 Hits Its Stride in 2009

Posted using ShareThis

SSV offers two P2 cameras, the Panasonic HPX170 DVCPRO HD 1/3" P2 camcorder and the HPX2700 DVCPRO HD/AVC-Intra 2/3" P2 Varicam camera. We are always happy to help bring our clients up to speed on the reliability and convenience of P2 file based recording.

Thank you to "Millimeter/Digital Content Producer" and author Helmut Kobler who I enjoyed meeting at Varicamp in November.

Thursday, October 1, 2009

Why Shoot With A Full Size, 2/3" Camera?


These days all the buzz is about new cameras such as the RED ONE or video DSLR 35mm still/video cameras and a myriad of palmcorders, which get better and better. It seems that the old faithful, 2/3" 3-CCD, ENG shoulder mount camera is just not getting much attention anymore.

There is no doubt that some of these new cameras are breaking new ground due to their large CMOS sensors, shallow depth of field, small form factors and low price. We know that no one camera can be the best choice for every kind of shoot, that's why SSV offers 1/3", 1/2" and 2/3" cameras and Letus Ultimate 35mm Cine adapters to go with all of them.

It occurs to us that there are many young filmmakers who may never have shot with 2/3" CCD cameras. With that in mind, here are some reasons why this type of camera can still be advantageous on many productions:

1. 2/3" CCD's are more light sensitive, have lower noise, shallower depth of field, can resolve small detail better, offer more latitude and have more image control parameters than most small sensor cameras.

2. 2/3" ENG form factor cameras are made for hand-held work, balancing properly on the shoulder and the larger mass makes tripod use easier. The viewfinders are usually superior as well.

3. 2/3" cameras have a wide variety of lenses available vs. smaller sensor cameras, typically with longer focal lengths and higher zoom ratios.

4. 2/3" tapeless cameras often have more recording capacity than palmcorders and video DSLR cameras, and no 5-12 minute record limit per take, unlike the latter.

5. 2/3" cameras are very rugged and durable, the technology is proven and the companies that offer them have many years of experience building them, offering parts and professional service infrastructure to support them worldwide.

6. 2/3" cameras feature professional level recording formats, tape or tapeless, they will offer proven work flows, less compression, higher bit rates, often better color space and more post production flexibility for grading and color correction.

7. 2/3" cameras tend to have better ergonomics with controls that are easier to see and get at.

8. 2/3" cameras often have better and more audio features and many have slots that can accept two-channel wireless mic. receivers internally.

9. 2/3" cameras are a lot easier to shoot with when it comes to depth of field and ergonomics vs. large sensor cameras, which have very shallow depth of field whether wanted or not. One ENG zoom lens often covers every shot needed with smooth, internal servo motors for iris and zoom functions.

10. Most professional crews are familiar with 2/3" cameras and they can be rented in most parts of the world.

11. Due to the light sensitivity and contrast handling that the best 2/3" cameras offer(about 10 f-stops), time and money can be saved by not having to control contrast via lighting and grip equipment and more crew vs. a small sensor palmcorder(about 7 f-stops at best).

The large sensor cameras are new to the scene and are not necessarily designed with video production in mind, having compromises and limitations, such as poor ergonomics and monitoring, constant firmware upgrades addressing certain issues while creating new ones, overheating, need for rebooting in the middle of a shoot, complex workflow, lack of in-camera control of the image, lack of internal image processing, short record time, and limited audio features. They aren't conducive to professional hand held work, very difficult to keep moving action in focus, low bit rate, highly compressed recording codecs, CMOS artifacts such as skewing with fast pans or motion, due to rolling shutter, moire, color fringing and aliasing on edges due to filtration of the single sensor, and IR contamination. Typically, multiple lenses are required to do the same thing a single 2/3" ENG zoom lens can.

Things are moving quickly in the realm of HD camera technology, but sometimes the tried and true approach is the best approach--productions are challenging enough without the camera being an additional risk factor.